3 Best Form Tips for Trail Running

TRM_1.png

Trail running calls to many runners for different reasons! It can be the quiet of the surroundings, the exploration of new places, the softness of the dirt, or the fun of never having to stop for a street light. Some runners are drawn to the trails because they feel it is “easier” on their bodies than the road. There is some truth to this in that runners tend to take shorter and more varied steps on trails, which does decease impact. Trails offer many benefits, but sometimes keeping in mind a few form tips keeps runners happy and healthy for the long run.


TRM_2.jpg
 

1) Pick up those feet!

One of the exciting features of trails is the many rocks and roots that speckle the trail. Our feet must be able to react to these changes. No matter the pace, being agile will decrease risk of falls and sprained ankles. Here are a few fun warmups!!!

  • Jump rope: 1 min intervals in place for 3-5 sets, focus on clearing the ground and pulling those knees up rapidly. The ropes rhythm forces a more elastic cadence with our feet!

  • Box jumps: these are great whether you have access to jump boxes at the gym or just use a curb or stair step. For 10-20 reps practice bounding with both feet clearing the ground, pulling knees up toward your chest, to land with feet entirely on the box or curb. START SMALL and try to repeat in smooth jumps on and off the step , work up to 30-45 seconds of bounding back and forth, 3-5 sets. Use step heights that feel easy and work your way up!


2) Running Uphill: Tall Lean for the Glutes!

Efficient form: LEANING FORWARD FROM THE ANKLES AND PUSHING “TALL” THROUGH THE GLUTES Running with a proper forward lean is having the body stacked in a straight line with a gentle lean from the ankles as they push off. This allows most of the weight of a runner to be positioned in front of their foot strike to allow ease with forward motion. A lean INTO a hill helps move the body forward with the least amount of work. YOU MUST BE SURE TO STRENGTHEN YOUR HIPS TO GET THE JOB DONE (maybe another article (: ****Self cue: practice squeezing your glute muscles (buttock muscles) with each leg during the “push” up the hill. This will straighten your hips up and forward to get you to the top. Also this will make you stronger with longer and steeper climbs!


3) Running downhill: Lean Into the Hill

Descending a hill or a long run downhill sounds easy, but many have experienced the sore quadriceps and high rates of knee pain with this kind of terrain. Downhill naturally involves more impact because the ground is sloped away from us, and we land with a more straightened knee. We can mitigate this impact with a subtle change of posture.

Poor form: LEANING AWAY FROM THE HILL AND “BRAKING” WITH YOUR HEELS It seems natural to lean back when you run downhill, but this will actually increase impact and risk for knee pain and heel pain.

Efficient form: SLIGHT LEAN FORWARD DOWNHILL AND CYCLING THE FEET IN QUICK SMALL STEPS. I tell people this usually will feel like a “plank” and your abdominals will automatically tighten with this technique. The lean will match the downhill profile, a small lean for gentle downhill and a greater one (considering your ability to stay in control and move your feet fast enough) with larger hills. Practice on easy downhills or road. This is also a great drill to improve foot turn-over in general. This will feel less stiff and therefore less impact on the knees.

***Self cue: place finger on your chest and slightly lean into it. Try to keep light pressure on your finger as you hold your downhill lean.


I hope these quick tips help! If you have any questions about this article or would like more information on running form, feel free to check out my Video Library page or email me at runnersmechanic@gmail.com.

Uphill Drills and Strengthening

Warm Up

  • Wand Squats (Heels on the Floor) 8-12 rep

  • Wand Split Lunges (Tall posture with Flat Back) 8-12 rep


Agility Ladder 8-12 rungs

TRM_19.jpg
  • Forward step and Side step 4 laps   

  • Single leg ankle hops : Forward and Side 2 laps (AmazonBasics Agility Ladder $12)


Activities

  1. Power A Skip 10-20 m


2. Push Press 5 reps, 4 sets

**Remember to let knees flex quickly right before driving bar up and extending knees fully, “pops” the bar overhead


Box Jump 5 reps

6,8,12, or 24 in box or step

*Can start in a seated position for extra challenge to gluteals and quads

Focus on quick landing of both feet COMPLETELY planted on the box

(Can improvise with running stairs/bleaches and slow step down to return if at a track)

TRM_22.jpg

Bungee Single Leg Take Off with Step

  • Forward 30 sec 2 sets

  • Side 30 sec 2 sets

Med Ball Deep Squat Throw 5 times


Equipment

Agility Ladder:

(AMAZON): $11.95 REEHUT Agility Ladder w/Free User E-Book + Carry Bag - Speed Training Equipment for High Intensity Footwork (8 Rungs 12 Rungs 20 Rungs)

Sports Cord:

(AMAZON) $29.95 Scandinavian Sports Bungee Resistance Speed Band Set – 360° Rotation, 80 lbs Resistance Strength Bungee Cord 22ft Length, Sport Cones and Bonus Exercise Folder – Acceleration & Speed Training Tool

If you need a door anchor for the cord: (AMAZON $8.50) DYNAPRO Door Anchor- Made Extra Large to fit D-Handle Resistance Bands

Step:

AMAZON : Adjustable 6-8 in arobic step $35.99Best Choice Products 30in Height-Adjustable Aerobic Step Platfrom Exercise Accessory w/ 3 Levels, Non-Slip Surface

WalMart: $67 Buy-Hive Plyometric Jump Box Fitness Exercise Jumping Platform 12"/18"/24" Bounce Training

WalMart: $107 Sunny Health & Fitness No. 072 3-in-1 Foam Plyo Box Jump Training


Downhill Eccentric Strengthening Program

*Below are the Descriptions of the Exercises Depicted Below

Warm up:

  1. Moving lunge walk for hip flexor stretch (KEEP LOW BACK FLAT SO DOESN’T ARCH) 8 rep each side

  2. Hip hinge squat with stick 20

  3. Agility ladder 8-12 rungs: forward step 2 ladders, side step 2 ladders, diagonal steps 2 ladders

#1 Time Under Tension (TUT) Squats:

**An easier seated option is listed first below for those with knee pain or beginners

  1. Stand tall on one leg:

    1. Go into Single Leg Squat counting to 3-5 seconds (Sit back into hip hinge squat till hip at level of knee or as low as can control)

    2. Hold at the bottom of the squat for 3 seconds

    3. Place other foot on ground to push back up into tall standing

    4. 5 reps for 4 sets, 2min break btw sets (add 1 more set for more advanced program)= total reps 20-25

    5. ***During 2 min rest can do other core and upper body exercises, clap push ups, pull sups, sit ups with partner ball throw

  2. Can make more challenging with

    1. Hold weight like a med ball, overhead bar, or hand weights

    2. Perform on a decline surface 30-45 deg

  3. Cable or band option: Can do these for last 1-2 sets

    1. Perform TUT squat holding a cable or band, and perform row (both hand hold) at bottom of squat for extra core challenge

#2 Eccentric Plyometrics (Cable or Sports Cord)

***FORM is VERY IMPORTANT- hip bones stay level and squatting knee stays over 2nd toe (doesn’t dive or collapse inward)

  1. 20 seconds of Single Leg hopping forward with “soft” landing either in place or advancing toward the cable (rest 20 sec) perform 2-3 times

  2. 20 seconds of Single Leg Hopping to the side with “soft Landing (rest 20 sec, perform 2-3 times)

#3 Box Jump DOWN with SOFT LANDING

1. Both legs 5 reps 3 sets (can do a higher step 8-12 in)

2. Single leg 5 reps 3 sets each leg (may want to start lower step 6-8 in)


#1: Seated TUT for Seated Position (Easiest Option)

Best done using the Knee Extension Machine at gym, but can use ankle weights at home

  1. Control with weight with both legs going up

  2. Lower the weight for a count of 3-5 sec with ONE LEG


TUT Single Leg Squat Standing (More Advanced Option):

Count 3-5 seconds to descend into squat, hold at bottom 3 seconds


#2: Cable or Sports Cord Bounding

Forward "soft" single leg squat landing against cable (holding weight for core challenge)

Forward "soft" single leg squat landing against cable (holding weight for core challenge)

Forward "soft" single leg squat landing against cable (holding weight for core challenge)

Forward "soft" single leg squat landing against cable (holding weight for core challenge)

Side to Side Single Leg Hop using sports cord or cable - hop from one leg, to the side, landing on the other leg CLOSEST TO THE CABLE (holding weight for core challenge)

Side to Side Single Leg Hop using sports cord or cable - hop from one leg, to the side, landing on the other leg CLOSEST TO THE CABLE (holding weight for core challenge)

#3: Box Jump: Down with Soft Landing

Double Leg Box Jump *note: land "sitting back" into hips for SOFT landing (trunk will be angled forward). Do not land with body vertical and hard through knees. Knees should face forward.

Double Leg Box Jump *note: land "sitting back" into hips for SOFT landing (trunk will be angled forward). Do not land with body vertical and hard through knees. Knees should face forward.

Double Leg Box Jump *note: land "sitting back" into hips for SOFT landing (trunk will be angled forward). Do not land with body vertical and hard through knees. Knees should face forward.

Double Leg Box Jump *note: land "sitting back" into hips for SOFT landing (trunk will be angled forward). Do not land with body vertical and hard through knees. Knees should face forward.

Single Leg Box Jump - focus on landing with knee forward and "soft"

Single Leg Box Jump - focus on landing with knee forward and "soft"

Single Leg Box Jump - focus on landing with knee forward and "soft"

Single Leg Box Jump - focus on landing with knee forward and "soft"


Equipment:

Agility Ladder

  • (AMAZON): $11.95 REEHUT Agility Ladder w/Free User E-Book + Carry Bag - Speed Training Equipment for High Intensity Footwork (8 Rungs 12 Rungs 20 Rungs)

Sports Cord

  • (AMAZON) $29.95: Scandinavian Sports Bungee Resistance Speed Band Set – 360° Rotation, 80 lbs Resistance Strength Bungee Cord 22ft Length, Sport Cones and Bonus Exercise Folder – Acceleration & Speed Training Tool

  • If you need a door anchor for the cord: (AMAZON $8.50) DYNAPRO Door Anchor- Made Extra Large to fit D-Handle Resistance Bands

Step

  • AMAZON : Adjustable 6-8 in arobic step $35.99 Best Choice Products 30in Height-Adjustable Aerobic Step Platfrom Exercise Accessory w/ 3 Levels, Non-Slip Surface

  • WalMart: $67 Buy-Hive Plyometric Jump Box Fitness Exercise Jumping Platform 12"/18"/24" Bounce Training

  • WalMart: $107 Sunny Health & Fitness No. 072 3-in-1 Foam Plyo Box Jump Training

Treatment of Chronic Hamstring Pain in the Runner

hamstring pain

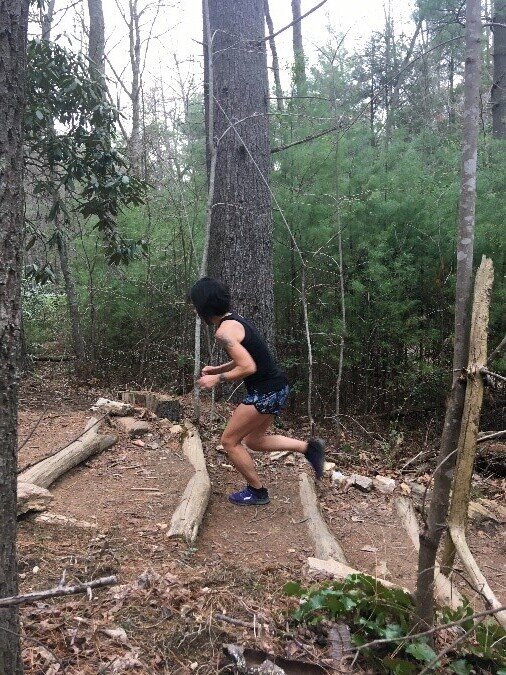
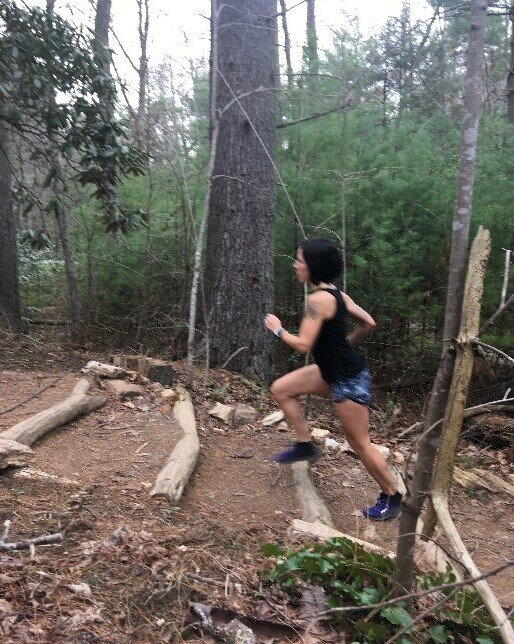
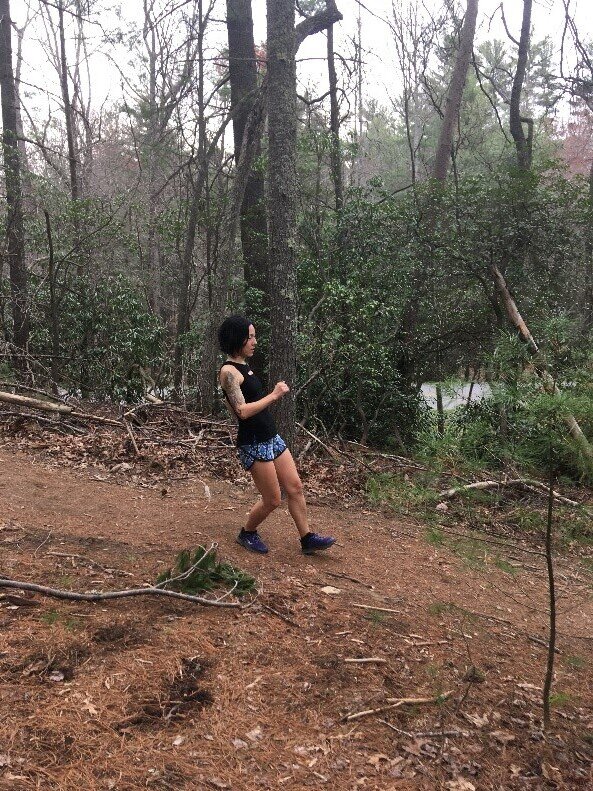
Yes, if have grabbed your backside in pain after a run like this guy, it is most likely hamstring pain!

I have been working with runners for 18 years, and it is really a wonderful and exciting experience helping so many meet their goals. This is especially rewarding in the instance where a runner has been dealing with a frustrating, and at times long-term, injury. 

Tendon injuries are 30-50% of all sports related injuries. Tendinopathies are pain at the site of a muscle tendon which has persisted for more than 12 weeks therefore considered chronic versus more recent, or acute. Tendinopathies comprise 30% of all reported running related injuries. 

Changes within the tendon over time are very important to how we, as physical therapists, treat these injuries. Long term tendon injuries usually do not respond much to complete rest from activity or anti-inflammatories.  The two stages of exercise programs which have shown good results are 1) initially 1-2 weeks of exercises called isometrics, which means holding an exercise for a duration of time, 30-60 seconds in this instance, and 2) gradually adding in weekly eccentric exercises, a movement which is SLOW (3-5 seconds) resisting a weight which feels challenging. This exercise format has been a game changer for making more immediate changes in pain relief and performance.

For years, tendinopathies have been one of the more confounding injuries for both the runners who experience them and the health professionals who treat them. What happens over time is the tendon loses its STIFFENESS. This seems very counter-intuitive because as runners we always think we need to stretch and become LESS stiff. These two kinds of stiffness are different. In this instance, a normal aging process that occurs after we are 30 years old results in our tendons being less able to transfer force as efficiently as when we were younger. This is defined as “stiffness”, and with less of this the tendon is less resilient against stress. Just like an old rubber band that gets stretched out and loses its “snapping” ability. If we couple an aging tendon with certain forces sustained with running, sometimes overtraining or an inefficient gait patterns, the tendon starts to become inflamed and painful. After enough time the inflammation stage can turn into this degenerated stage of tendinopathy. Treatment then must be targeted less on inflammation, because for the most part that isn’t the main issue anymore. It is then imperative we tap into our bodies’ own healing ability using GRADUATED LOADS OF EXERCISE to CHANGE the tendon back to its normal state! 

SO… That is the “why” of the following exercise program. “How” do we do this now? 

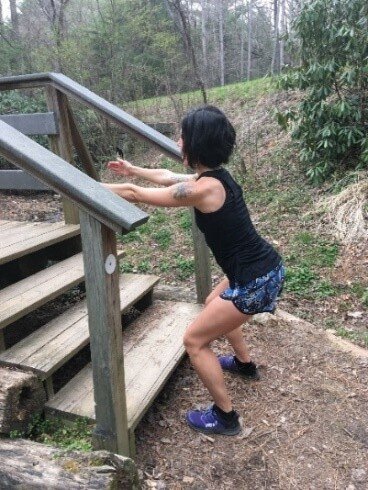
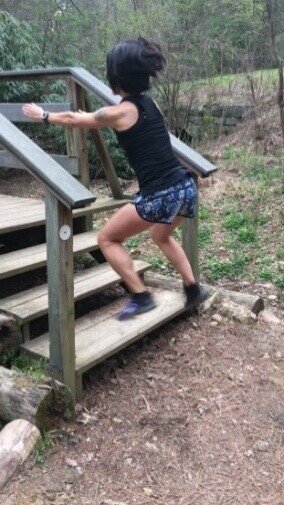
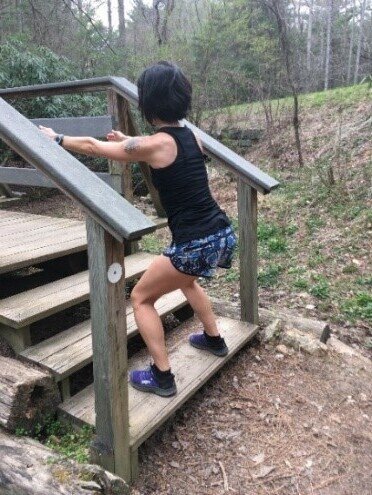
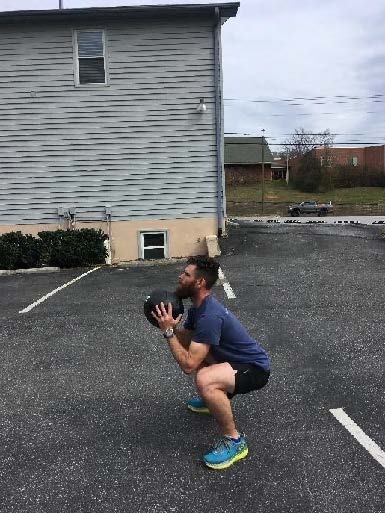
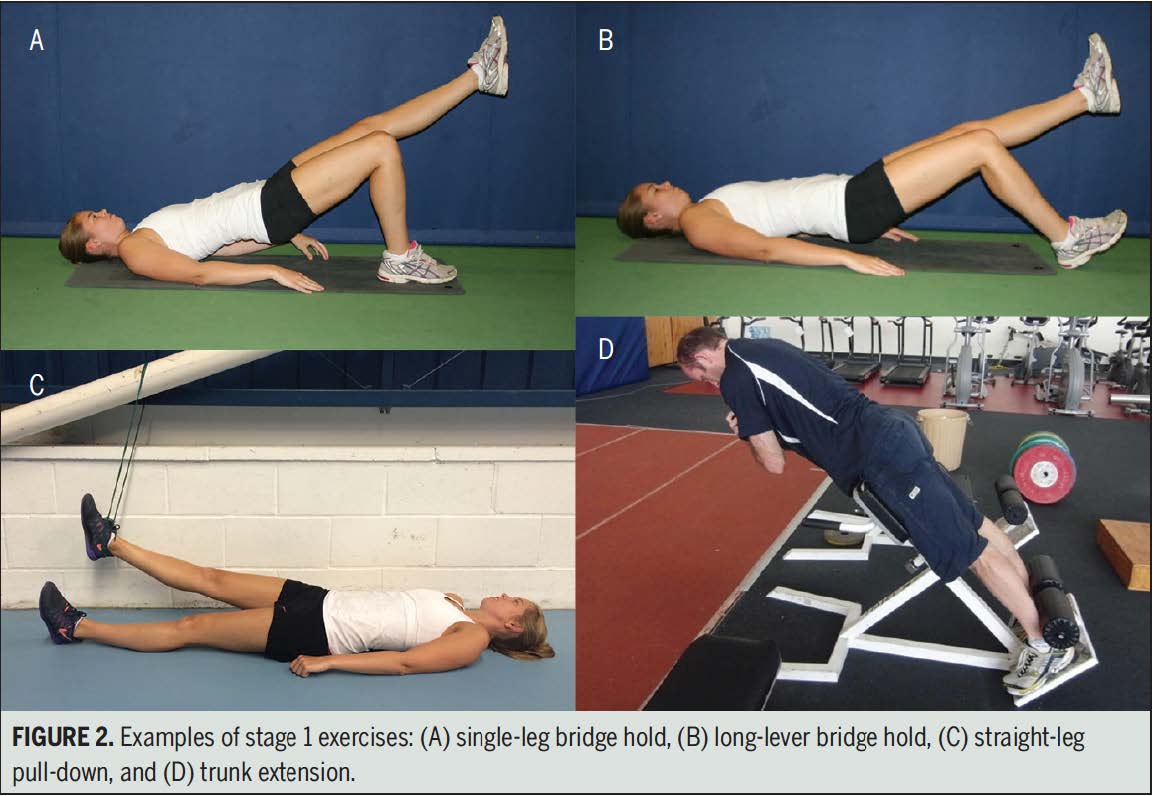
The first initial isometric exercises you will hold 30-60 each for 3-5 sets. These are the rules:

  1. Do daily with 70-90% of your maximum effort

  2. Pain is ALLOWABLE DURING exercise if equal to or less than a 5/10 on your self-rated pain score (0/10 is pain free and 10/10 is highest pain rating), AND subsides by the next day

  3. Stop if exercises aggravate another condition, such as low back pain etc. Feel free to contact me for other isometric suggestions

  4. Hip is in a neutral position, such as with standing (not deeply flexed as in a squat)

  5. This program can be combined with other techniques such as massage, manipulation, trigger point dry needling, taping, etc. but do refrain from direct pressure such as foam rolling or lacrosse ball trigger point release DIRECTLY over the tendon itself (on the muscle belly is perfectly fine)

Big question… what to do about running? So, the general guideline is you can keep running with the following suggestions:

  1. If you keep running, use a pain rating system (BE HONEST) so you keep your routine at or below a 5/10 pain, resolving by the next day. *** If you are unable to modify your pace or duration to keep below 5/10 you may need to purely cross train a week or 2, then try again

  2. Temporarily avoid hills and speed work as much as possible- due to the anatomy of the hamstring tendon this will prevent the tendon from being “wrapped” around a flexed hip while it recovers

  3. Decrease frequency to every other day or 2 days, with cross training using any PAIN FREE exercise you like (swimming, spin, elliptical, etc)

After the isometric program, you will move into a gradual eccentric program, slowly progressing your hip flexion angle which I would be happy to help you with, and hopefully will write about soon in an upcoming post.

I am very grateful to get to share this, and please feel free to email me or check my website for videos, tips, or upcoming workshops. For years I have been a big fan of Glory Hound’s events, and the opportunity to speak to its amazing runners!

Cheers! Miriam 

 
stretches for runners